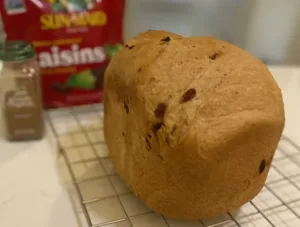
Let's Make Some Bread!
There’s something undeniably comforting about the aroma of freshly baked bread filling your home. With a bread machine, transforming simple ingredients into warm, crusty loaves becomes an effortless endeavor. If you’ve ever dreamed of becoming a master bread baker from the comfort of your own kitchen, then a bread machine is your ticket to bread-making bliss. In this beginner’s guide, we’ll walk you through everything you need to know to use a bread machine like a pro. Learn the advantages of making your own bread.
Getting Started: Understanding Your Bread Machine
Before diving into the bread-making process, take some time to familiarize yourself with your bread machine. Read the instruction manual thoroughly and become acquainted with its various settings and functions. Most bread machines come with pre-programmed cycles for different types of bread, including basic white, whole wheat, gluten-free, and more. Understanding how to navigate these settings will give you the confidence to experiment with different recipes and flavors.
Gathering Your Ingredients
The beauty of bread machines lies in their simplicity. All you need are a few basic ingredients to create delicious homemade bread:
- flour
- yeast
- water
- salt
- sweetener (such as sugar or honey)
For added flavor and texture, consider incorporating extras like nuts, seeds, dried fruits, or herbs. Measure out your ingredients carefully, following the recipe instructions provided with your bread machine or experimenting with your own custom creations.
The Bread-Making Process
Bread-making in a bread machine simplifies the traditional process, making it accessible to even the most novice bakers. Here’s a step-by-step guide to the bread-making process using a bread machine:
1. Gather Your Ingredients: Before starting, gather all the ingredients you need for your chosen bread recipe. This typically includes flour, water, yeast, salt, and any additional ingredients like sugar, oil, or seeds.
2. Add Ingredients to the Bread Pan: Begin by adding the ingredients to the bread pan in the order specified by your bread machine’s instructions. Usually, liquids go in first, followed by dry ingredients, with the yeast added last. Be careful to keep the yeast away from the liquids until the mixing process begins to avoid premature activation.
3. Select the Settings: Once all the ingredients are in the bread pan, place it securely into the bread machine. Select the appropriate settings based on your recipe and personal preferences. This typically includes options for the type of bread (e.g., basic, whole wheat, French), the crust color (light, medium, dark), and the size of the loaf (1-pound, 1.5-pound, 2-pound).
4. Start the Machine: After selecting your desired settings, start the bread machine. The machine will begin the bread-making process, which typically consists of several stages: mixing, kneading, rising, and baking. Each stage is automatically controlled by the bread machine’s internal timer and settings.
5. Monitor the Process (Optional): While the bread machine does the work, you can monitor the progress through the viewing window on the machine’s lid. However, avoid opening the lid unnecessarily, as this can disrupt the baking process and affect the quality of your bread.
6. Enjoy Freshly Baked Bread: Once the bread-making cycle is complete, the bread machine will beep or signal to indicate that your bread is ready. Carefully remove the bread pan from the machine using oven mitts, as it will be hot. Then, transfer the loaf to a wire rack to cool.
7. Allow Bread to Cool: Let the bread cool for at least 15-20 minutes before slicing into it. This allows the steam to escape and the bread to set properly. Slicing the bread too soon may result in a gummy texture.
8. Clean and Store the Bread Machine: After removing the bread, clean the bread pan and kneading paddle according to the manufacturer’s instructions. Some parts may be dishwasher-safe, while others require hand-washing. Once clean, store the bread machine in a dry, well-ventilated area until your next baking adventure.
Bread machines take the guesswork out of bread-making, allowing you to enjoy freshly baked bread with minimal effort. With a wide range of recipes and customization options, the possibilities are endless. Whether you prefer a simple white loaf or a hearty multigrain bread, your bread machine can help you achieve bakery-quality results in the comfort of your own home.
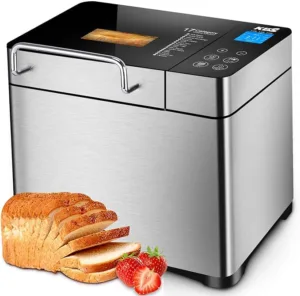
Different Types of Bread Machines
There are several types of bread machines available, each catering to different preferences and needs.
One common type is the horizontal bread machine, which produces traditional-shaped loaves. These machines often come with multiple settings for various types of bread, such as white, whole wheat, or gluten-free.
Another popular option is the vertical bread machine, known for its compact size and ability to produce tall, cylindrical loaves. Vertical machines are ideal for small kitchens or individuals with limited counter space.
Additionally, there are specialty bread machines designed for specific types of bread, such as artisanal or sourdough loaves. These machines typically offer advanced features and customizable settings to achieve the desired texture and crust. Overall, the variety of bread machines available ensures that there’s a perfect option for every home baker, whether they’re beginners or seasoned enthusiasts.
Bread Machine Care and Maintenance
Proper care and maintenance of a bread machine are essential to ensure its longevity and optimal performance. After each use, it’s important to clean the bread pan, kneading paddle, and interior of the machine thoroughly to remove any residue or crumbs. These components are often dishwasher-safe or can be washed by hand with warm, soapy water.
Additionally, it’s advisable to wipe down the exterior of the machine with a damp cloth to remove any spills or stains. Regularly inspecting the bread machine for signs of wear and tear, such as frayed cords or damaged parts, is also crucial for safety. Lubricating moving parts, such as the kneading mechanism, as recommended by the manufacturer can help prevent premature wear. Storing the bread machine in a cool, dry place away from direct sunlight and extreme temperatures can further prolong its lifespan. By following these care and maintenance practices, home bakers can enjoy years of delicious homemade bread from their bread machine.
Where to Purchase Bread Machines
Bread machines are widely available for purchase both online and in-store, providing convenience and accessibility to home bakers. Online retailers such as Amazon, Walmart, and eBay offer a vast selection of bread machines, often with detailed product descriptions, customer reviews, and competitive pricing. Additionally, specialty kitchenware stores like Williams Sonoma, Bed Bath & Beyond, and Sur La Table carry a range of bread machines, along with knowledgeable staff who can provide guidance and recommendations based on individual needs. For those who prefer to see the product in person before making a purchase, department stores like Target and Kohl’s often have bread machines available for demonstration and purchase. Furthermore, second-hand marketplaces such as Craigslist or Facebook Marketplace can be excellent options for finding pre-owned bread machines at a discounted price. Whether shopping online or in-store, there are plenty of options for purchasing a bread machine to elevate your baking experience at home.
Patience is Key
Once you’ve initiated the bread-making process, sit back and relax. The bread machine will take care of the rest, mixing and kneading the dough, allowing it to rise, and baking it to perfection. Depending on the type of bread and the settings you’ve chosen, the entire process can take anywhere from a couple of hours to several hours. Resist the temptation to open the lid during the baking cycle, as this can disrupt the rising process and affect the texture of your bread.
Enjoying the Fruits of Your Labor
When the baking cycle is complete, your bread machine will emit a delightful aroma, signaling that your loaf is ready to be enjoyed. Carefully remove the bread pan from the machine (using oven mitts, as it will be hot), and transfer the loaf to a wire rack to cool. Allow the bread to cool completely before slicing into it—this helps preserve its texture and prevents it from becoming dense or gummy.
Experiment and Have Fun
Once you’ve mastered the basics of using your bread machine, don’t be afraid to experiment and get creative. Try different types of flour, add-ins, and flavor combinations to customize your loaves to suit your taste preferences. With a little practice and experimentation, you’ll soon discover the endless possibilities that a bread machine offers.
In conclusion, bread machines are a rewarding way to create delicious homemade bread that rivals anything you’d find in a bakery. With a few basic ingredients and a bit of patience, you can enjoy the satisfaction of baking fresh bread from scratch whenever you desire. So dust off your bread machine, roll up your sleeves, and let the bread-making adventures begin!
Here are a few of my bread machine recipes to get you started: